Winter is not a popular time for high power rocket launches. Few clubs actually hold major launch events in the winter months – and the rare brave souls who do are nevertheless subject to the weather. I did find a local club (about a 4 hour drive from Seattle) that has a standing FAA waiver to launch one day each month, but the weather hasn’t been cooperating and so it was cancelled in December, January, February, and March.
Fortunately, spring is here, and clubs start holding many more launches in the coming months, as the weather steadily improves. Unfortunately… COVID-19 hit, and everything is cancelled until further notice. So April is out, and probably May as well. Everyone is at home, with shelter in place and lockdown orders in effect.
On the bright side, it’s a great time to start construction on my next rocket. My most recent project, the HyperLOC 835, has a 4″ diameter body, with a 54mm motor mount. The body is made from (very durable) cardboard and the nosecone is plastic. It’s a great rocket and I’m looking forward to launching it on several different motors, and with a flight computer and electronics bay capable of dual deployment.
My next rocket, though, will be the Wildman Rocketry “Darkstar Extreme.” It also has a 4″ rocket body, but with a 75mm motor mount that can fit more powerful motors, potentially up to an M. (As an aside, an N or O motor only comes in the 98mm variety and would require an even larger diameter motor mount.) The rocket body is made from fiberglass, and the nosecone is fiberglass as well with an aluminum tip.
the darkstar extreme, in sexy and exciting two-dimensional glory
Above is the design file for the Darkstar Extreme, from Rocksim, a rocket design and simulation program.
And here’s the description from the manufacturer, Wildman Rocketry:
“TAKING IT TO THE MAX Leave it to Wildman to push the Darkstar to the Max with this radical upgrade. No Mildmen allowed! This beast is ready to rock on any motor you can stuff in it!”
Can’t go wrong with that. Time to take full advantage of the quarantine.
I alluded to the fact in the last two posts that there are some laws and regulations applicable to electrical work.
Among other things, your city or state will require you to obtain a permit (and pay a fee) before you can even begin the work. In Washington state, this is the Department of Labor & Industries. The work needs to be done in accordance with certain requirements, and then an inspection is required once it’s complete. At that point, you notify the Department and schedule a date, and an electrical inspector will come on site to review all of the work.
It’s not uncommon to fail an inspection and for remedial action to be required. An inspector can fail you no matter how small the violation, relative to the overall work done.
Judge not, lest ye be judged – amirite? Unfortunately, it’s literally the inspector’s job to judge – and he or she has significant power and discretion.
purely cosmetic
What are the requirements governing electrical work? There are several, and they are no joke. I had to bring myself up to speed quickly.
The NEC is “national” but is not technically a federal law. However, it has been adopted in all 50 states, which can also modify it as they see fit – so the rules can and do slightly vary from one region to another.
In Washington, there are state-specific statutes and regulations further modifying the standard NEC rules.
where the magic happens
So what are these rules, exactly? There are far too many for a comprehensive list, but here are a few examples:
Conduit minimum depth underground. Copper wire must generally be enclosed inside conduit (metal/rigid or PVC) and, if horizontal and running across the ground, must be buried so the top of the conduit is at least 18″ underground.
Securing conduit. Conduit that is vertical and runs along walls (indoor or outdoor) must be secured with straps (plastic or metal) at no greater than 36″ intervals.
Conduit bends. You can physically bend conduit – with heat, if it’s PVC, for example – or you can attach 90 degree (or 45 degree) PVC “elbows” for turns. But the total turns cannot exceed 360 degrees. That means, for example, you could have a maximum of four 90 degree “elbows” or PVC pipe bends.
Panel clearance. Installation of a new electrical panel or sub-panel must have a certain minimum amount of clearance in front of it. Specifically, a minimum width of 30″, depth of 36″, and height of 60″. Visualize a telephone booth-like invisible box in front of the panel that must be completely unobstructed to ensure access to the panel.
Tamper-proof outlets. Electrical outlets (or “receptacles”) inside a dwelling unit (e.g. a house) must be tamper-proof. Inside a shed, which is not a dwelling unit, they don’t need to be – until the 2020 version of the NEC takes effect this summer, at which point even the shed would need all outlets to be tamper-proof.
GFCI outlets. For safety reasons, a ground fault circuit interrupter (“GFCI”) is required. Either the electrical panel needs to have a GFCI circuit breaker, or at least one outlet needs to be a GFCI outlet.
Ground rods. The new electrical panel for the shed requires at least one copper ground rod, and depending on the soil quality (specifically, its electrical resistance), possibly requires two. A ground rod comes in a standard length of 8 feet and has to be driven completely down into the ground. A bare copper wire (not insulated or inside conduit) connects the ground rod to the electrical panel. This is again for safety reasons, to redirect excess current.
junction box/ outlets
The NEC and its state and local variations of the electrical code have many more rules that must be followed. The above list is just a small fraction of things I learned during the course of this project – all from my friend Darrin, noted electrical expert and lifelong student of the electrical code, among other titles.
Again, the reasons for these rules are often pretty self-explanatory. Clearance in front of a panel is important so that a person has unobstructed access to the panel. Copper wire should be inside conduit when buried, in order to protect it from future damage – and that conduit should be buried pretty deep, for the same reason. The rules are mostly about safety and common sense.
As soon as we completed all the work, I scheduled the inspection. This was on a Sunday afternoon, incidentally, and the inspector showed up first thing Monday morning – record response time.
Judgment day!
The inspector was friendly, and he seemed quite impressed with all the work and how thoroughly it was done. He agreed it met all the applicable requirements in the code, with just a couple of very minor issues to address. These were promptly fixed, and the project officially passed inspection.
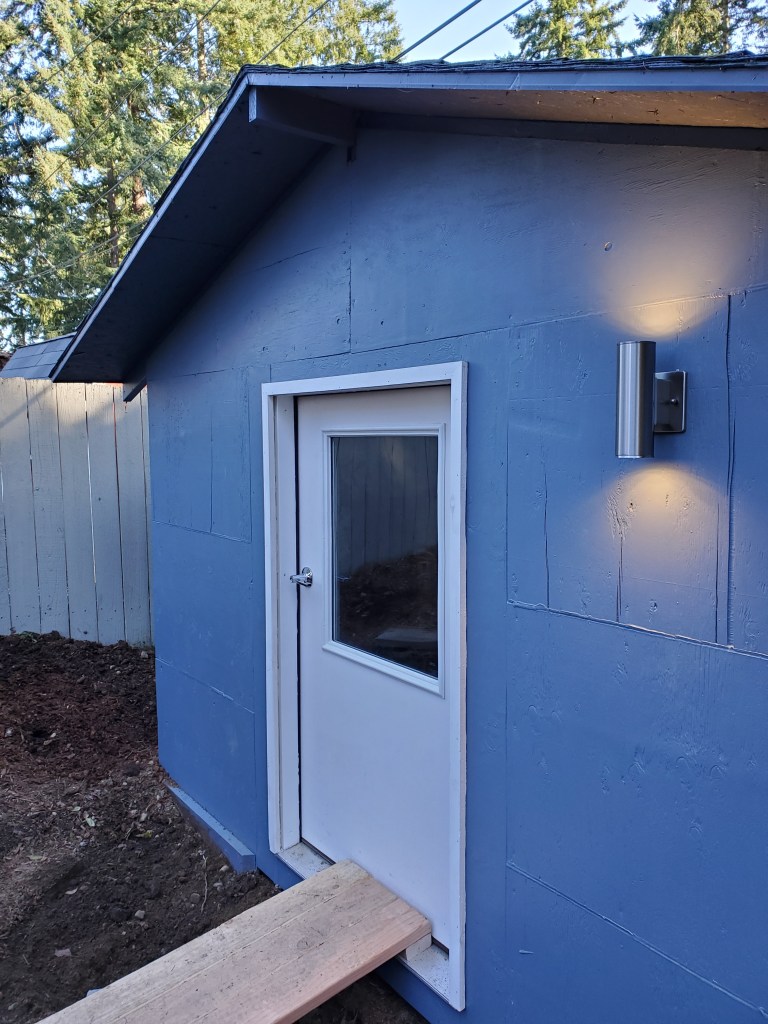
All I need to do now is a bit of final cleanup work – fill in that huge trench; clean up the mess everywhere from sawing, drilling; get the landscaping back in order with about a hundred wheelbarrows of mulch; and so on.
I think at this point, the backyard garden shed can officially and rightfully be called a workshop.
As mentioned in my last post, we recently got away for a week in Hawaii. What a trip!
resort life
This is a bit of a break from rocket activity, but it’s not totally unrelated – I did finish reading an excellent biography of Wernher von Braun during the flight, and I plan to write a couple of posts about that in the near future as well. And if nothing else, I needed an excuse to post a few pictures.
The Pacific Northwest is beautiful, but it can be pretty gloomy in the winter months – lots of darkness and clouds, with very little sun. This winter was particularly cloudy. Imagine day after day, week after week, with full cloud coverage, and virtually no sun. Relentless!
Luckily, Hawaii is not terribly far from Seattle: it’s just about a five hour flight. We’d never been to any of the islands before, and we decided on Maui.
The trip was a welcome relief from the despair of Seattle’s winter, and also a respite from the endless news coverage about the coronavirus throughout the country, particularly in Washington state. (See previous post.)
Below is a summary of our week’s activities in Maui, and of course, a couple of pictures.
road to hana
Itineraryhighlights!
Sunday – flight from Seattle to Maui
Monday – beach day at Kaanapali beach, dinner at Star Noodle in Lahaina
Sunday – lunch at the Fish Market Maui (fish tacos!) in Lahaina, and flight home to Seattle
beach sunset at kaanapali
We stayed at an airbnb in Lahaina, which was amazing. And of course, the trip was definitely punctuated by multiple trips to Costco (the only one on the island) to stock up on food and supplies, and for filling the gas tank.
Note: prices are even higher in Hawaii than they are in Seattle, and that’s saying something. But as you can see from the itinerary above, we really packed in a full week of adventure and also relaxation.
Below are a few final pictures (and, as always, check out my instagram if you want to see more).
haleakala summit
another beach sunset
black sand beach on the road to hana
Sometimes you have to take a break from building and launching rockets, if only to rest and recharge, and then get back at it!
You can’t go anywhere without hearing people talk about the coronavirus (COVID-19) lately. I mean, anywhere. Go for a jog or walk outside, and as you pass other people who are talking, more often than not their conversation is about coronavirus. Same with fellow diners in a restaurant, or co-workers in the office – if you’re still going into the office, that is, and not yet working remotely.
coronavirus
Airlines are reassuring passengers that they are taking appropriate safety measures to ensure that travelers are safe. The stock market is tanking, in part because of the economic harm caused by the virus (or by concern or panic about the virus).
I live in the Seattle area, and closer to home, the situation is a bit surreal. I read a recent New York Times article that prompted me to write something about this. Sure, this is generally a blog about building and launching rockets, but even that is impacted by the coronavirus epidemic and news coverage.
Amazon Spheres, downtown Seattle
As the New York Times article notes, Seattle is something like the epicenter for this virus in the United States. The first death from COVID-19 in the US was in Washington state, in King County (which is Seattle and some neighboring areas). As of today – March 10 – the Washington Department of Health is reporting a total of 267 COVID-19 cases and 25 deaths across the state. Alaska Airlines, based out of Seattle, is one of many airlines offering no change or cancellation fees for flights scheduled through certain dates. Amazon and Microsoft, whose headquarters are in the Seattle area, have recommended their employees in the area work from home. Facebook (which has a large Seattle office) has said the same thing.
State and local governments in Washington have also advised people to avoid large public crowded spaces or events. In fact, the governor of Washington has declared a state of emergency, as have several other states across the country, and is banning crowds of 250 or more people.
With respect to rocketry and related activities, some local rocketry clubs have either cancelled launches or warned that people not attend. Similarly, the Lake Washington Ham Radio Club, where I got my amateur license a couple months ago, cancelled its monthly meeting due to the outbreak.
What can be done in this situation except escape Seattle for the remote beaches of Hawaii? That’s exactly what we did last week, and in another post I’ll share just a quick overview of what we did (and, of course, some pictures)!
After a long self-taught (and frequently confused) journey involving assembling this rocket, and building the electronics bay, I just needed to track down some black powder, set up my ground station, and conduct a bit of testing. Basically, the idea here is that the e-bay (roughly in the middle of this rocket) has a flight computer on the inside and a black powder charge on the outside, and I can remotely detonate it, causing a small but controlled explosion that will separate the rocket and deploy the parachute.
The black powder was surprisingly difficult to find. The Seattle metro area certainly has no shortage of gun shops, but virtually none of them actually sell black powder. I called more than a dozen shops at increasingly far distances from the city limits in all directions, but it seemed like nobody sold it. Everyone pointed me to other shops.
Finally, I located a place about an hour’s drive away, and after they confirmed they had some in stock, I made the trip. The specific type of black powder I was looking for was FFFF.
all systems go
Like Jason in ancient Greek mythology returning with the golden fleece, I completed the epic journey, explosives in hand.
When it comes to the rocket separation charges, you want to use an amount of black powder that is sufficient to separate the rocket with some real verve, but also not so much you damage or destroy the rocket. Based on an online calculator, I started with 0.5g or approximately 1/8 teaspoon of black powder. This was the lower end of the estimated range (roughly between 0.5g and 1.0g) but it’s generally a good idea to start with less, test, and work your way up.
ready!
How do you actually pack the black powder after measuring it out? It goes into the appropriate container attached to the outside of your e-bay (on mine, a small PVC pipe end cap. But the real explosive force happens when the powder is packed tightly and confined to a small, totally sealed area.
This requires adding some “wadding” in the PVC end cap, and then covering the opening completely with tape. Any kind of tape will do the job – masking, electrical, etc. Again, the idea is to ensure the black powder is tightly packed and stays that way, and remains sealed off.
Having prepared this, I readied the rocket by putting the e-bay inside and then activating or arming the flight computer. I also have a “ground station” that can communicate with (and control) the flight computer remotely, consisting of a small handheld Yagi Arrow antenna, a TeleBT (dongle that connects to the antenna), and laptop using Altus Metrum software.
Using the software on the laptop, I armed the flight computer’s pyro charge and the countdown began. 3… 2… 1… fire!
post separation charge
The ground test worked and the rocket separated perfectly. My conclusions? I’m going to do more testing and will increase the amount of powder – gradually – to the high end of the range to see what works best.
I also need a sturdier structure to hold the rocket in place. I’m just using some makeshift wood supports I quickly threw together.
But the exciting thing is that it worked – with the push of a button on a laptop, I remotely activated the separation charge. The rocket separated, and the parachute deployed.
I’m just beginning to learn about the different kinds of electronics that can go into a rocket. It seems like there are virtually limitless possibilities, but I’ll give a quick overview below.
TeleMetrum v3.0 flight computer
A high power rocket often has an electronics bay (“e-bay”) or some payload area where you can put various types of payloads, generally electronics.
The options are really endless, but just to help provide some overall context, here are a couple of the major types or categories of electronics that can go into a rocket.
An empty e-bay
Altimeter. This is a simple device that measures altitude, or height. It uses changes in barometric pressure to determine height (starting by setting it to zero at the launch site, so that it has a starting point). It’s fun to launch a rocket, but it’s nice to know exactly how high it goes. I’ve heard great things about the RRC3 from MissileWorks, for example, as well as the StratoLoggerCF altimeter.
Parachute release. If you wrap the parachute with a rubber band so that it’s closed tightly, it won’t automatically open when it’s released at peak height. By using a very small chip, such as the Chute Release from Jolly Logic, you can control when that parachute actually opens up and deploys.
GPS/ radio beacon. It’s helpful to know exactly where your rocket goes, using something to record position data. It’s also helpful for finding your rocket after it inevitably disappears from sight and you have no idea where it landed. I’ve heard several people recommend the BeeLine GPS, for example, from Big Red Bee.
Flight computer. This is a small chip (e.g. the one pictured at the top of this page) that integrates several useful functions into a single device. A flight computer generally contains an altimeter and GPS/ radio beacon, but also contains “pyro channels” which can control parachute deployment. A flight computer allows a rocket to “dual deploy,” meaning you can deploy two separate parachutes, and you have a greater degree of control over when the rocket parts separate and the parachutes actually deploy. The flight computer pictured above is the TeleMetrum, from Altus Metrum.
Camera. Is there any limit to how creative you can get with putting electronics into a rocket? Not really! I’ve just begun to scratch the surface, but I know people put a GoPro or other camera on the outside of the rocket and record video during launch, so that you see the earth receding underneath. For some of the biggest rockets, you can even glimpse the horizon and the edge of the earth’s atmosphere.
My initial goal is to just figure out what I’m doing (I have no experience working with electronics) and put together the basic parts to create a functional e-bay with a flight computer. This is one of my 2020 goals – and specifically a January 2020 goal because I have a lot more to do this year.
Rocket motors are basically small explosives, so they are understandably treated as hazardous materials for purposes of transportation and shipping. Of course, you can be pretty confident they are safe: these motors are generally produced by large companies that have a tremendous amount of professional expertise, as well as hefty insurance policies.
Two companies primarily manufacture high power rocket motors: Aerotech and Cesaroni.
hazmat warning!
For my first high power rocket flight, I purchased an Aerotech I-140-14A “White Lightning” single-use motor with a 38mm diameter.
The “I-140” means that this is an “I” class motor (H or above in the alphabet is considered high power), and the 140 is the total thrust, measured in Newtons (N). In terms of high power rocket motors, this is not terribly powerful, but it’s still significantly more powerful than anything I’ve ever launched before.
The 14 is the number of seconds in the delay, after the motor propellant burns out, before the ejection charge fires to separate the rocket body and deploy the parachute.
Aerotech motor package
“Single use,” as the term implies, means that this motor can be used once. The alternative is a reloadable motor. I plan to try these in the future, but single use is the most simple and straightforward type of motor.
The 38mm is the diameter of the motor; you would typically buy a rocket motor that fits into the rocket’s motor mount tube. The diameters of 29mm, 38mm, and 54mm are all fairly common in HPR, although there are even larger sizes too. You can also always buy a smaller diameter motor for a larger rocket, and secure it using a motor mount adapter, which is just something that fills the extra space between the smaller motor and larger rocket tube, centering it carefully.
Since I have a 38mm motor and a rocket with a 54mm motor mount tube, I have just such an adapter, and I’ll cover building and installing the adapter in another blog post. A key consideration is making sure the motor and the adapter are completely secured with some sort of a retainer (e.g. ideally not just masking tape).
Aerotech motor + igniter
The motor here comes in a fancy yellow cardboard tube. Inside is also an igniter and a tiny vial of black gunpowder. The motor comes with instructions, but basically the gunpowder is inserted into one end of the motor and then covered with a plastic cap to seal it in. Later, when the rocket motor burns out, there will be a delay and then an ejection charge (shortly after apogee). The explosive force will be amplified by the black powder.
The motor is placed into the rocket like any smaller motor: inserted into the aft end of the rocket, after loading and securing the gunpowder on one end, and attaching the igniter on the other end. The only additional complication here is that I’m using the adapter, as mentioned above.
That’s it! The motors in HPR (and their installation) are really very similar to those in low or mid power rocketry, with small model rockets. The biggest difference is just the amount of propellant, and consequently, the amount of thrust.
Definitely looking forward to launching this thing, although I am expecting something less like the Falcon 9 and more like the Hindenburg.
I recently finished building my first high power rocket, and mentioned in my last post the difficulties involved in finding a launch site, especially at this time of year. I’d need to find a local rocketry organization that has a launch site (i.e. either owns the land or has permission to use it) and secures the FAA waiver for the appropriate date, and then – weather permitting – I could launch. Unfortunately, this is all easier said than done.
There are only a handful of organizations in the PNW, and most of them don’t hold any launch events in the winter. I did come across one group, Gorge Rocket Club (located in northwest Oregon) with a promising launch calendar even in winter months, and there was a recent weekend with a scheduled launch. I decided to go for it.
The FAA waiver allowed a launch window of just a few hours starting at 9:00am, and the location was in Goldendale, WA, which is a 4 hour drive from my home. This meant hitting the road at 5:00am when it was still dark outside for a nighttime drive east into the mountains. No problem so far. Just need to load up on coffee and a couple of podcasts.
Snowy mountain roads in Snoqualmie Pass
The drive out there would have been a bit more scenic if it weren’t in the early hours before sunrise. Due to a combination of darkness and fog, I couldn’t really see much of anything. On the way back, I did see some of the scenery; Snoqualmie Pass in particular is beautiful.
But as I drove through the pass and dawn started to break east of the mountains, I noticed the roads getting increasingly icy, and snow was beginning to fall. That’s not a great sign for a scheduled rocket launch. The further I drove, the more heavily it snowed.
Finally, as I approached Yakima about three and a half hours into this drive, I got the not-totally-unexpected news that the launch was cancelled due to heavy snowfall and no visibility. It was total whiteout conditions.
Not the most desirable location in Washington
I pulled over at a rest stop to make sure it was really cancelled, and took the opportunity to make use of the facilities while I was there. Then I began the three and a half hour drive back through the mountains to Seattle (this time with some better views).
I took a picture of a sign before I left the rest stop, though. The image basically sums up my day:
I didn’t literally fall, but I definitely slipped on some metaphorical level and landed on my ass. Also, my head physically separated from my shoulders when I heard the cancellation news.
But this is all part of the fun of launching rockets. I’ve read others’ stories about their first launches where something was cancelled, or the FAA waiver never went through, or the rocket launched but then suffered some catastrophic failure. C’est la vie. It was a pretty low key scenic drive.
I may get a chance to launch again in the same area in the next few weeks, though, and if so I’ll certainly take advantage of the opportunity. Fingers crossed!
After covering the rocket in white primer, I used a can of white spray paint to coat it again – everywhere except the nose cone, which I painted red. I considered making it white, too, for a uniform (if overly simple) finish, but a major issue with painting rockets is that certain colors can be really difficult to see against the sky.
White, silver, or blue blend in too well and it’s easy to totally lose track of the rocket once it gets high enough. For that reason, rockets are often really bold and vivid colors, and also more than one color.
I added the “Improbable Ventures” logo, too. First high power rocket, but definitely not the last.
Finished rocket
The completed rocket stands about 6 feet high. Inside is a parachute, a shock cord securing it, and a small fire blanket to protect the parachute against the extremely hot gas from the motor when it burns out and fires an ejection charge, separating the rocket in midair. There’s an electronics bay, but right now it’s empty. Prior to launch, of course, I’ll insert the motor as well.
Having built a few smaller (low power) rockets definitely helped me better understand what I was doing when building this high power one. As I’ve mentioned before, most of the basic parts are the same, and it helps to understand why you’re doing what you are doing, and not just blindly following instructions, even if they are idiot-proof. (We will see.)
The rocket is done, so my next step is to wait patiently for an upcoming high power launch hosted by a local rocketry club. But I may be waiting for a while.
While I could theoretically launch this thing by myself at any time, it’s not really practical. First, you need a proper launch pad and rails to keep it vertical during liftoff (I don’t have the equipment, but clubs do). Second, you need to find a very large area of land – many acres – that meets a long list of conditions ensuring it’s safe for launching rockets, and you need to either own it or get permission from the landowner. The launch site needs to be far away from any buildings or major roads (you don’t want a rocket crashing down, or even landing relatively softly with a parachute, in the middle of an expressway). And finally, you need to get an FAA waiver for launching high power rockets. A club will regularly apply for these waivers, which are specific to a particular date and time window.
I’ve mentioned before that our local Seattle area organization (Washington Aerospace Club or WAC) doesn’t currently have a high power launch site, so, until it does, it cannot conduct or host high power launches. There are other clubs in Washington or Oregon if I’m willing to drive 4-6 hours each way (and I am), but almost none of them host any launch events in the winter months. Things usually pick up again in March.
I just might have a slim chance in early Jan or Feb to launch with an organization in southern WA or northern OR, weather permitting (i.e. no snow or whiteout conditions). It’s unlikely, but possible. In the meantime I’m going to dive into two related projects: (1) starting to learn about electronics and building out my e-bay for this rocket (for future launches), and (2) transforming our backyard garden shed into a small workshop for rocket construction.
Motor retainer: helps prevent costly braces and unnecessary trips to the orthodontist during the rocket’s awkward teenage years.
Motor retainer, end cap unscrewed
All kidding aside, the motor retainer is simple but important. Extremely important, actually. Anyone reading this who has flown rockets before – of any size – knows what I’m talking about.
If you haven’t, here’s the deal: a motor burns for a period of time (a couple of seconds, generally) and the explosive force shooting out of the bottom of the rocket propels it in the opposite direction. If things are going well, this direction is up, into the sky. But once the propellant burns out, after a brief delay, right around apogee, it triggers a smaller explosion at the opposite end of the motor. This is basically an ejection of very hot gas inside the rocket. That gas has nowhere to go, and cannot escape. The explosive force breaks the rocket apart, at a place where the rocket is designed to easily separate – and inside is a parachute, which gets pushed out. Science!
But the hot gas filling the inside of the rocket only has “nowhere to go” and breaks the rocket apart if the motor itself stays securely in place. If it’s not sufficiently secured, then this event will forcefully push the motor backwards, out the bottom of the rocket!
This is dangerous and is a big problem for at least two reasons. First, the motor will simply fall back to the ground, without any kind of parachute or recovery device, and it could injure someone. A high power rocket can have a pretty large and heavy motor.
Second, if the hot gas pushes the motor out of the rocket, then the rocket will not properly separate where it’s designed to, and the parachute will not have any chance to deploy. This means the entire rocket will come crashing down, which will almost certainly irreparably damage the rocket. The falling rocket – without anything to slow it down – could also seriously injure someone.
Motor retainer, attached
Enter: the motor retainer. This is a simple device, made of some durable metal (e.g. “precision machined aluminum”) and comes in two circular rings. One ring is permanently epoxied to the motor mount tube at the aft end of the rocket. The metal on both circular parts is threaded, and the other ring is basically an end cap that screws onto the first ring. The end cap prevents the motor inside from sliding (or violently ejecting) out the back. The reason it’s in two parts that can attach or detach is to easily allow you to insert a new motor, or remove an old one, after each flight.
Given what would happen if a motor fell out the bottom of the rocket, to both the rocket itself and any innocent bystanders below, having a high quality motor retainer in place to secure the motor can literally make the difference between a successful flight and total disaster.